
Friday, 14 November 2014
"Whoosh" gif
Year 2 - Project 1 - Games As Art
.png) |
| Dear Esther - This way, please. |
A Look At Narration
.png) |
| Dear Esther - Follow the light. |
It's not what I would deem a game. Dear Esther is a story, with a slideshow of gorgeous scenery after gorgeous scenery. You cannot alter the story by taking a more rebellious path. You have no heads up display, or true objective. Only the power of suggestion.
Not calling it a game is not, however, an insult. It's just healthier for a consumer to know what to expect. When you call something a game, you imply many things about the product. Things that Dear Esther does not have.
Upon listening to a full one hour walk-through of the novel, with no commentary, I came to enjoy the poetic writing of each chunk of narration. The metaphors of kidney stones and islands were striking. When my attention flitted back and forth from my sketchbook to the video, I gazed upon some truly beautiful scenery. Where the lighting was bleak and grey, it fit the tone of the story - and the atmosphere of England, generally. But then to be contrasted by the phosphorescent caves, covered in stalactites that created interesting breaks in dark and light. All tied together by the glassy reflections in the shallow water.
The screenshots I picked (above) from the start of the novel display some of the ways the environment lures the "player" through the narrative. The rocks (top) that have cascaded down the shallow cliff-face provide a safe walkway to the shore. And the distant red blinking light of a tower (bottom), only just visible over the rocks, serves as a constant suggestion as to where the "player" is to finish their journey. To make it more alluring, that's even where the sky breaks, letting through a biblical beam of light to guide your attention.
These practices interest me. For example, in your common action-adventure game, you are given waypoints to lead you to your next progressive point in the game's narrative. If you were to strip that away and only use these suggestive techniques, would the player be able to comprehend where to go - even whilst fighting the malicious AI? Or is this a strategy that can only be adopted by something like Dear Esther, where your attention is nearly never taken away from the environment?
.png) |
| The Walking Dead - Telltale Games |
Presenting your fiction through the 3D medium allows a new way to experience your story. For Dear Esther, it puts a reader in a far more clear cut vision of the writer's imagination. A more concise realisation of how the words should make you feel. For Telltale, it's to give the reader freedom of choice.
Wednesday, 24 September 2014
Year 2 - Induction
 |
| Brainstorm |
 |
| Getting back in to the swing of drawing - it had been a while |
Induction
Over the summer we were set the task of developing a character that resides in a post-apocalyptic world.I spent some time coming up with a way for the world to end. I brainstormed for a while until I snapped to the world losing the arms-race with bacteria. With that, I created a human male, tore off limbs - lost in an explosion - and replaced them with cool exoskeleton-esque appendages. I did this with gameplay in mind. I wanted a character that was justified to move very quickly and fall from great heights, since I enjoy good movement in video games (with a history of arena shooters - Quake, Shootmania: Storm, CoD4 Promod, Loadout).
The first task given to us upon returning to college this September was to draw up an orthographic of our character. This was something I needed more practice at, so was glad to be given the opportunity. I felt like it went alright, but taught me how difficult it is to stay accurate and true to an organic design when looking at it from different angles.
 |
| Some design thought in to the look of the prosthetic limbs |
 |
| Orthographic of male lead character |
Happy with that, I sunk my teeth in to Mudbox. I enjoyed working with it a lot more than physical clay, since the virtual tool-set was a nice crutch for my limited skill. And working with tablets allowed me to utilise my traditional drawing skill.
The exercises over the induction period have provided excellent opportunity to revive my work ethic, learn about form - particularly human, and how important it is to work from references.
 |
| Doodling more interesting shapes |
I am slowly learning that I need to increase the size of my sketches. Filling the page of a sketchbook will feel better without so much negative space.
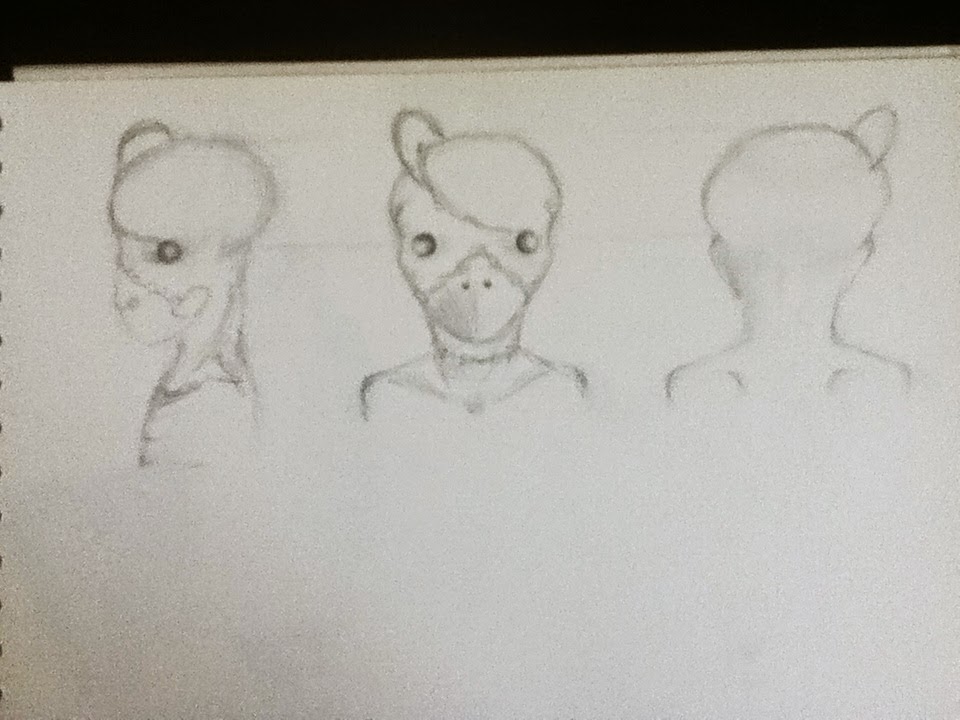 |
| Orthographic of Mudbox creature |
Here are some progressive screenshots of my work in Mudbox (below).
.png) |
| Save file 2 - cutting jagged lines |
.png) |
| Save file 5 - refining shapes and seems |
.png) |
| Save file 8 - adding teeth |
 |
| Jar Jar Binks vs Admiral Ackbar + a meth addiction |
The John Wilkes Booth
Okay, so it's more of a classroom than a booth, but our lessons with Mr Wilkes have been enjoyable. With a more technical air to the atmosphere, each session feels like a work-out for our drawing hands. The first task was a reminder of perspective, a necessary exercise. Secondly, we had some still life drawings to do. A test of how well we can interpret what is in front of us, and then show on paper. Our mark-making techniques were strained.
However, my rebellious side shined through during the second task, as I grew tired of drawing the goat skull sat in front of me. I turned my POV (the back) of the goat's skull in to a hideous creature instead. With Mr Wilkes' permission, of course.
Sunday, 3 November 2013
Evaluation of Final Model
Evaluation Time
.png)
For the functionality, or whether it looks like it would work, I think that I could have spent more time gathering resources of people holding weapons such as this, so I would create a more correctly proportioned model. I'm not 100% sure a player model could successfully wield the weapon without some issue. Other than that, it looks like it would fire straight... ish.
Now, one part of me wants to say, "there are parts of this model that are boring and flat" (the ammo clip, for example). However, another part of me is screaming, "please, no more details, I don't understand unwrapping well enough!". In fact, upon learning about unwrapping, I was tempted to remove some pieces of my model. So that I might have more of a chance of finishing with a complete, unwrapped and textured model. But instead, I felt that the details were what was making the model pleasing for me to look at, so I decided against that. My favourite detail to add were the cogs behind the grate, which really set off the steampunk feel. They were also not concepted, and I found that it was fun to not follow a concept when modelling.
I am satisfied with my mesh at the end. I had to remake some parts, after realising how mistakes I had made were affecting other sections of the model. I am aware that the rivets don't necessarily need to be modelled, and instead can be done with texturing, and lightmaps etc. But, of course, I haven't the required skill. However, there were no massive mistakes in the mesh that I know of, so that's a plus.
.png)
The unwrap is sketchy, so far. However the wood and metal textures I've picked out made the render quite pretty looking. I chose a dark, natural wood, for a finish that makes the weapon seem aged. The copper/brass textures had some handy wear and tear markings on them, that I managed to make use of on the gas canister.

Here is the current render. It's most definitely subject to change, as I want to work more on the model's unwrap (you can still see some obvious tearing in the textures). Despite learning about three point lighting, I decided to use only two lights on this render. This is because my third light felt as though it was ruining the moodyness of the scene that I'd achieved with just the first two lights. I especially like the sharp specular being picked up on the spring.
I'm not sure what else to evaluate. I'd like a run through of what's expected in this evaluation, that would be cool.
Friday, 1 November 2013
Geometric Theory
Geometric Theory


Mesh Construction Techniques
Box Modelling
.png)
Box modelling is a common way to use Maya to create a 3D representation of your concept. So, you start with the base primitive shapes; cube, cylinder, sphere, pyramid etc. Next, we can edit the mesh of the shape, by adding further subdivisions, which will give us more leeway with shaping the cube later.
.png)
Here I've added subdivisions to each the height, width and depth. Then, I can select specific faces, and use the extrusion tool to add more complexity to the mesh.
.png)
.png)
This creates more faces, edges and vertices, thus developing the mesh. Box modelling is great for producing a rough draft of your final product.
Extrusion Modelling
 With extrusion modelling, instead of starting with a primitive shape, you would start from what would be an edge of your model, using NURBS. This gives you lots of accuracy with creating bends and curved shapes. After the lines are made, extrusion tools would be used to start forming the model around the lines you have created.
Displaying 3D Models
Direct3D and OpenGL are application programming interfaces (APIs) that are used in consoles; the xbox uses Direct3D. This allows the graphics card to access greater performance through hardware acceleration. Granting more detail to a game environment, and features such as anti-aliasing and mipmapping.
Direct3D provides a specific pipeline for the work process of the GPU:
- Input Assembler
- Vertex Shader
- Hull Shader
- Tesselation stage
- Domain Shader
- Geometry Shader
- Stream Output
- Rasterizer
- Pixel Shader
- Output Merger
Of course, Direct3D and OpenGL aren't just used in video games, but anywhere that high performance graphics are required, like in simulation.
Pre-Rendering vs. Real-Time Rendering
Pre-rendering is a process typically used in the film industry, where a scene is not rendered by the playback device, but instead is a recording of a scene rendered on another machine. This allows you to use a more powerful computer (or perhaps multiple computers) to render your scene, creating much higher levels of detail with many more polygons in the scene, higher resolution textures. Of course, the downside is that it lacks interactivity, thus why it isn't used greatly in video games. Pre-rendered lightmaps allow for much more realistic lighting, however they are not convincing inside a game engine, as they won't react to changes in light very well.
Real-time rendering is done on the playback device, leaving a scene fully interactive. Due to this, it restricts the level of detail available in the scene. A lower number of polygons, and lower resolution textures, are allowed. However, as technology progresses and hardware becomes faster, our poly count is always on the rise. Lighting in real-time means that dynamic shadows can be cast, like from a torch being held by the player, for example.
Tuesday, 29 October 2013
Worklog #2 - 29/10/13
Worklog time! It's long overdue. So, in terms of development of designs, 3 ideas were settled on, and orthographics were made for each design (handcuffs, cane and rifle). The rifle went from a melee/sniper weapon hybrid to a steampunkified rifle for only the most gentlemanly of marksmen.
.png) I can't find any version of the file that's older than this. Blocking out the proportions and shapes.
I can't find any version of the file that's older than this. Blocking out the proportions and shapes.
 Making adjustments to length of the barrel, 'cause the rifle seemed a bit stumpy.

 Beginning to dislike the shape of a few pieces of the rifle. The back piece, attached to the spring, and the trigger. The trigger was just a hole, and it just seemed out of place. The shoulder-guard's shape was too round and didn't fit in to the aesthetic of the rest of the model.
 Added finishing touches to the ammo clip and shoulder guard.
 A closer look at some of the finer details inside the rifle, behind the grate.
 And a peek at the wireframe.

As you can see, I decided to model the rifle. I'm on to unwrapping now (have been for several weeks), however I'm having trouble with getting my head round it. I feel a little unstable and lost while doing it, despite it being demonstrated to me twice now. I fear I won't have a fully textured model at the end, due to the fact that I couldn't have possibly taken in to account the fact that I had to unwrap and texture my model, as it wasn't explained to me until after I'd finalized my model. Had I known this prior, I'd have kept some simpler shapes/added less detail, because right now I feel like I've bitten off more than I can chew.
Now, in terms of Photoshop, I am worried once again, as I don't have access to a tablet at home. So, finishing my piece off with the mouse will be both frustrating and unsatisfactory. With only having learnt some Photoshop basics in the penultimate week of college (which I had to ask for), I only had 3-4 days at college to make use of the tablets. The same goes for watercolours, for most people.
All in all, I'm unhappy with how this module has been laid out. Organisation was low, we were being given tasks that we didn't know about half way through the 6 weeks. We spent many sessions being left to our own devices, when many wanted to learn software techniques that'd be helpful to us. A full "to do list" was only presented to us on the 5th week of the module. This would've been nice to have on day 1. It felt like there was a lack of communication between each of the tutors. And whenever I asked for critique on something, I often just received a shrug. I feel like criticising the technicalities of a drawing, or the quality of a model's mesh is important to progress. Being told that "it looks alright" is far too vague.
I realise that this is less of a worklog now, more of a complaintlog or something. And I'm aware that this probably isn't the best place to be expressing how I feel about the course, and instead I should be speaking to tutors directly. But I guess I'm a coward.
Anyway, I look forward to the start of the next module, and to hopefully see that it's handled better.
Oh, lastly, I definitely didn't take enough notes on this module. I need to grab me a physical notepad and whip it out ALL the time. I've been using my iPod's notepad, but it's too limited.
3D MODEL PROGRESSION PICTURES INCOMING
Creating the gears was troublesome at first, but once I figured out a simpler method to achieve the geometry, it became much easier.
As you can see, I decided to model the rifle. I'm on to unwrapping now (have been for several weeks), however I'm having trouble with getting my head round it. I feel a little unstable and lost while doing it, despite it being demonstrated to me twice now. I fear I won't have a fully textured model at the end, due to the fact that I couldn't have possibly taken in to account the fact that I had to unwrap and texture my model, as it wasn't explained to me until after I'd finalized my model. Had I known this prior, I'd have kept some simpler shapes/added less detail, because right now I feel like I've bitten off more than I can chew.
Now, in terms of Photoshop, I am worried once again, as I don't have access to a tablet at home. So, finishing my piece off with the mouse will be both frustrating and unsatisfactory. With only having learnt some Photoshop basics in the penultimate week of college (which I had to ask for), I only had 3-4 days at college to make use of the tablets. The same goes for watercolours, for most people.
All in all, I'm unhappy with how this module has been laid out. Organisation was low, we were being given tasks that we didn't know about half way through the 6 weeks. We spent many sessions being left to our own devices, when many wanted to learn software techniques that'd be helpful to us. A full "to do list" was only presented to us on the 5th week of the module. This would've been nice to have on day 1. It felt like there was a lack of communication between each of the tutors. And whenever I asked for critique on something, I often just received a shrug. I feel like criticising the technicalities of a drawing, or the quality of a model's mesh is important to progress. Being told that "it looks alright" is far too vague.
I realise that this is less of a worklog now, more of a complaintlog or something. And I'm aware that this probably isn't the best place to be expressing how I feel about the course, and instead I should be speaking to tutors directly. But I guess I'm a coward.
Anyway, I look forward to the start of the next module, and to hopefully see that it's handled better.
Oh, lastly, I definitely didn't take enough notes on this module. I need to grab me a physical notepad and whip it out ALL the time. I've been using my iPod's notepad, but it's too limited.
Wednesday, 2 October 2013
Primary and Secondary Resources
Firstly, a primary resource is an image that you have taken yourself, or
even something that is right in front of you, like a fruit bowl, or a
nude woman. A secondary resource is an image that someone else has
created. Images in a concept art book, for example.
 (An example of a secondary image)
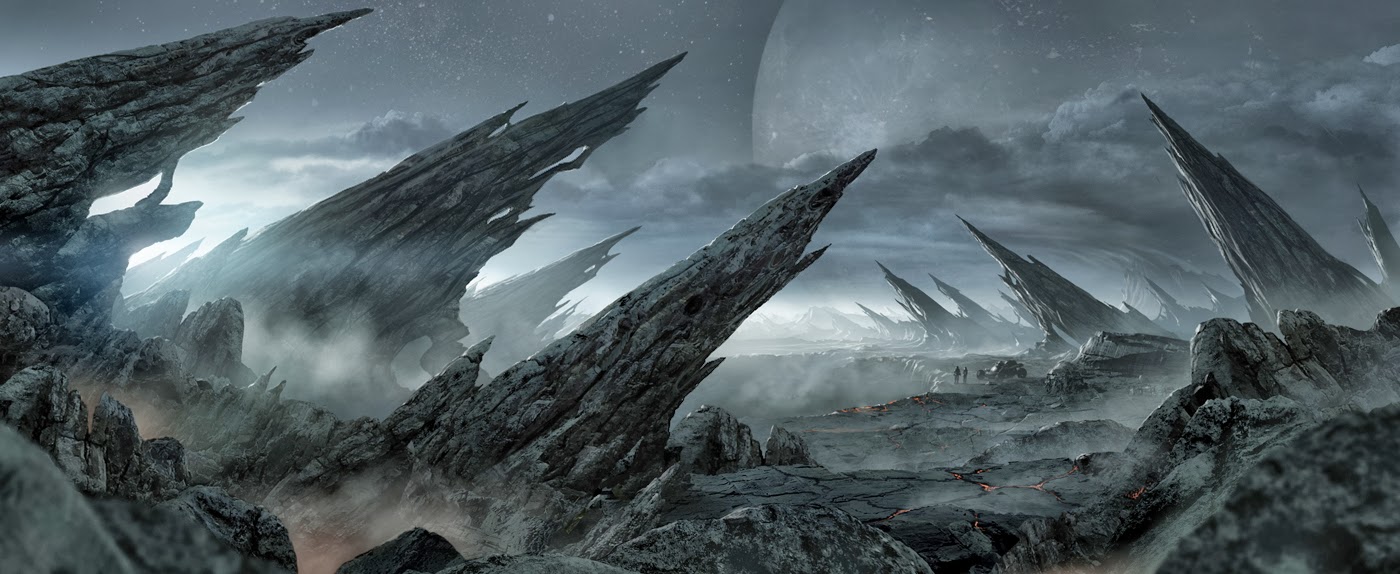
Primary images are a great reference, since you've taken them yourself, you will be looking at exactly what you need to be creating what you desire - angle, scene, objects will all be how you want them. Even the colours and mood will all be set by yourself. All be-it, they can be tougher to get a hold of. Firstly, you'd need a camera, but more importantly you need to be able to find/create the sources you want to capture. For example, primary observation for landscapes would mean you must explore in order to find what you are looking for. For the image above, some research of stalagmites would perhaps be useful. Finding a cave full of stalagmites isn't an easy task. This is where secondary recources come in.
You can pool together a large collection of other people's images very quickly nowadays, thanks to search engines. If you need 20-30 photographs of stalagmites or stalactites in a cave, it will take a matter of minutes to amass what you require. This amount of reference is incredibly useful. However, the downside is that you didn't take them yourself, therefore they might not be to the taste of what you want. Perhaps all the photos you find are of concrete stalagmites, when you really wanted more pictures of limestone stalagmites. Maybe the angles of the photographs aren't interesting enough, and you would have liked a different persective. Or, on the contrary, they're much better than any image you could have put together yourself, and prove a higher quality reference.
A good balance of the two is perfect to create an accurate and belieavable scene,object, or creature.

(I don't have any way to add a primary image of my own in to here, so here's another secondary instead.)
Subscribe to:
Posts (Atom)